How to Integrate Mail Chimp with Icegram Engage
Integrate your Mail Chimp from with Icegram with these quick steps.
MailChimp Integration example
Part 1: How to get the Form in Mailchimp?
Step 1: Go to Lists. Click on the list name you want to generate a subscription form for.
Step 2: Go to Signup forms. Select Embedded forms
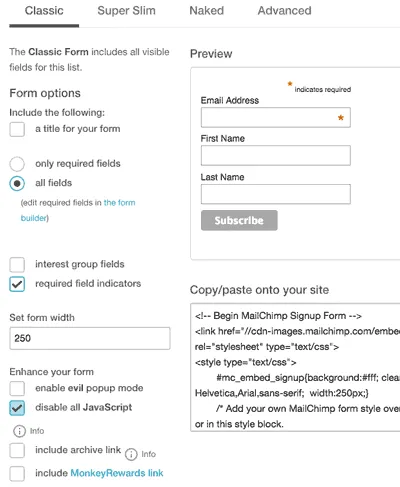
Step 3: Icegram Engage can work with any HTML code here - including the ones that have custom JavaScript and CSS code in them. For example, you may use the "Classic" form like this:
Step 4: But what may work best, is to use "Super Slim" or "Naked" form, with minimum number of fields. The "Naked" form gives minimal form HTML code and you can easily customize it if needed.
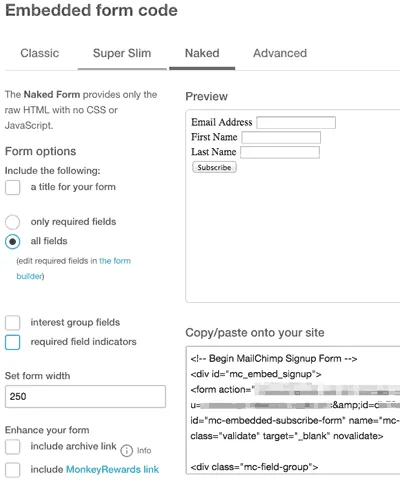
Step 5: Copy the HTML code from "Copy/paste onto your site" textbox.
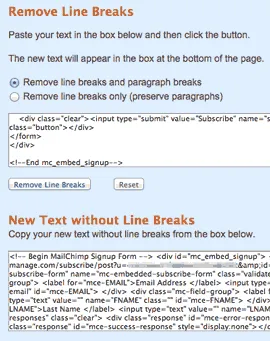
- This form code has lot of line breaks. And extra line breaks cause extra paragraphs in WordPress. So let's clean it up so that everything is on a single line. To do this,
Step 6: go to TextFixer's free online line break / paragraph removal tool. Paste MailChimp's form embed code. Remove line breaks. Copy the resulting HTML code.
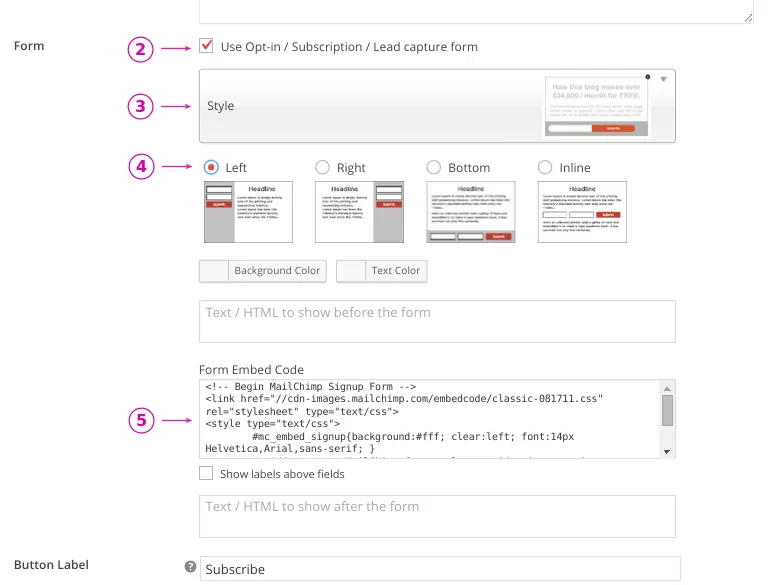
Part 2: How to insert this HTML in Icegram Engage Form Embed Fuctionality?
Step 1: Create a new campaign & add the message type of your choice
Step 2: Tick mark the form checkbox in the content editing panel of the message type
Step 3: Next select a form style.
Step 4: Select the position of the input boxes. They are graphically represented so you can choose them easily.
Step 5: Paste the HTML code / short code of your third party service or simply add HTML code for your custom form
Step 6: Save draft and Check preview. If everything is well, Go live!